Modifying the keyboard connections of an original Spectrum case
What I did is something not for the timid… It’s a bit of preserving work. Please realise that doing this is at your own risk and I can’t be responsible if you damage the keyboard beyond repair… Use much caution in doing this! Remember to take your time and carefully think about each step, what you will do next. One very important thing to observe is the fact that the foil material itself has dried out through the years and has lost it’s flexibility somewhat. So don’t bend it at all at first, and during the work, bend them only as minimally as absolutely is necessary. I advise to first properly strengthen the foil with some layers of tape, before proceding to give the foil a slight bending which is necessary, see the photos below. That is what I did. First I cut off a section of the keyswitch foil’s connector strip, leaving just enough for connecting the connectors to them directly. Next I strengthened the foil strips with several layers of tape. Make sure to solder the connectors to some flatcable BEFORE putting in the keyboard foil in order not to damage the foil strip with the heat of soldering. Next I inserted the foil strips into the connectors and glued the connectors securely to the spectrum case. this way, when you are about to carefully insert the tape-strengthened strip into the connector, after that you can immediately glue the strips to the case. Make sure to pick a spot for glueing which has sufficient space to accommodate the connector inside the case. When using superglue(it’s the best) make sure not to get too much glue on or it might get inside the keyboard and you won’t want that. The trick is to get just enough glue to leave a nice and good contact layer. Another thing to observe is to leave the glued case open with the glued area facing upward for a day in order for all of the glue’s solvent to completely evaporate. This solvent otherwise might discolour your Spectrum case’s plastic with a typical white shade that is often observed when using superglue.
As an example here are some pictures of what I mean. It’s my renovated Spectrum 48k Issue 3B which I bought and repaired according to the repair manual. You can use this modification for an original Sinclair PCB or for example also for the Spectrum Issue 7. In that case, remember to leave more length to the flatcables because the keyboard connectors are not in the standard location. It’s best to make them really long first and then shortening them (after fitting) in such a way that there is sufficient length to reach the connectors on the PCB properly, but not to leave too much excess cable which might get caught between the case shells.
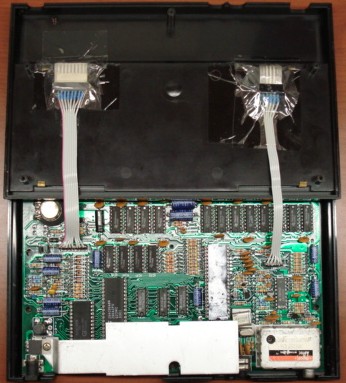
An overview of the new keyboard connections.
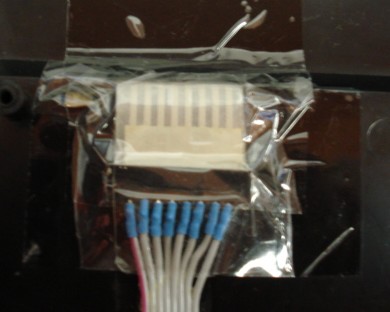
A closer view of the new connection glued to the upper shell.
The keyswitch needs to bend in order that the connector can be glued to the case. The big pieces of tape I put over the whole assembly is just for extra insulation, protection, and keeping the strip tightly inside the connector. Remember if you also want to tape it to make sure the glue is totally dried first. The connector I used is soldered out from the original Spectrum PCB since it’s not needed there anymore anyway.
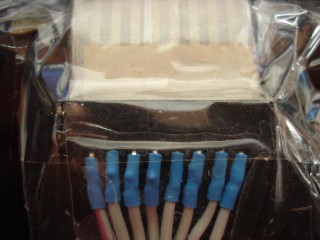
Even closer
Note that the keyswitch above is first strengthened with some layers of tape to keep it in a good curve, preventing it from folding sharply and possibly breaking.
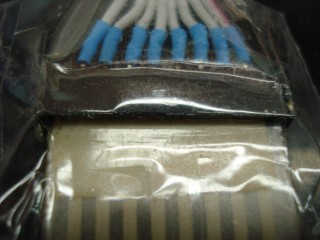
A view from the other side
You can see the shortened keyswitch strip inserted into the pre-soldered connector. Remember if you are going to do this to strengthen the strip with tape first, not only to not let it bend easily but also to strengthen the strip when inserting it back into the connector.
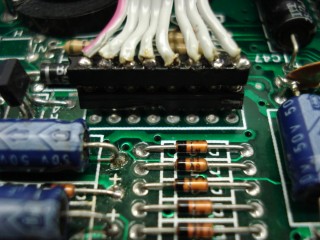
A close-up of the PCB Side
Here you can see my solution on the PCB side, I used the same precision IC strip as a PCB connector as wel as soldered one onto the keyboard flatcable. This way you can easily remove the keyboard cables when working on the PCB.
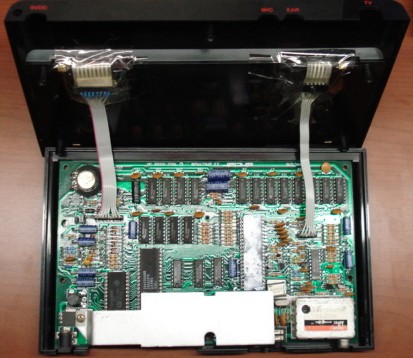
Final picture
Where you can see the length of the strips, just enough to bend just before the edge of the case so that the bent strips are nicely placed inside the case.
One final note: if you are doing this with an original Spectrum PCB, make sure that the parts underneath the glued connectors are not in the way when you close the case. The best thing would be to desolder any parts that are sticking out too much and soldering them back in closer to the PCB. My Issue 3B board for example had some transistors with very long legs. So I took them out and soldered them back closer to the PCB surface. One of the things that could happen if components are too long is possible breaking off the legs of components or bending them so far that they create short circuits. So make sure nothing is constricted under the keyboard connectors or the keyboard flatcables.
